Quick Start
This page gets you from a fresh Houdini scene to a shaded character you can animate, in five steps. Every control is explained in depth later, in Using the Asset.
Before you begin
Make sure your character is exported from Character Creator correctly. The export settings genuinely matter — see Preparing Your Character first if you haven't already.
Inside a Geometry object, press Tab, type Reallusion, and place a Reallusion Rigger node (under JV).
At the top of the node is an Import dropdown. Leave it on USD (the default, and much faster) if you exported a USD file, or switch it to FBX for an FBX export. New to the two modes? See USD vs FBX.
Then set the file field the dropdown shows — USD File or FBX File — to your exported file.
Keep your character's textures beside its file, exactly as Character Creator exports them — a Materials folder next to the .usd, or a textures folder next to the .fbx. The tool resolves them relative to the character file.
Click the Build Character button.
The tool imports the character, builds all of its materials, sets up displacement and wrinkles where the character supports them, and creates a look controller. Then, because Build APEX Rig is on by default, it builds the rig in the same press and bakes the character's own animation through it. On our test characters the whole press takes roughly 40 to 90 seconds; the progress bar at the bottom of the Houdini window shows what it's doing.
When it finishes, a Reallusion Rigger APEX Rig node sits directly below the Rigger. That node is the animatable character, and it is now the displayed node.
Careful with this one
The rig freezes the character it was built from. If you change the import settings or the character file afterwards, nothing updates — delete the rig node and press Build Character again. Pressing it while a rig exists only refreshes the materials, and leaves the rig and your animation alone.
Select the rig node and press Animate. You're now in Houdini's APEX animate state: pick a control in the viewport, move it, key it. The character's own animation is already there, as the BaseAnimation layer, so you're refining it rather than starting from nothing — or press Add Rest Pose Layer (the first icon in the rig node's Layers row) to start from the rest pose on a layer of its own. Exit Animate State returns you to the normal view.
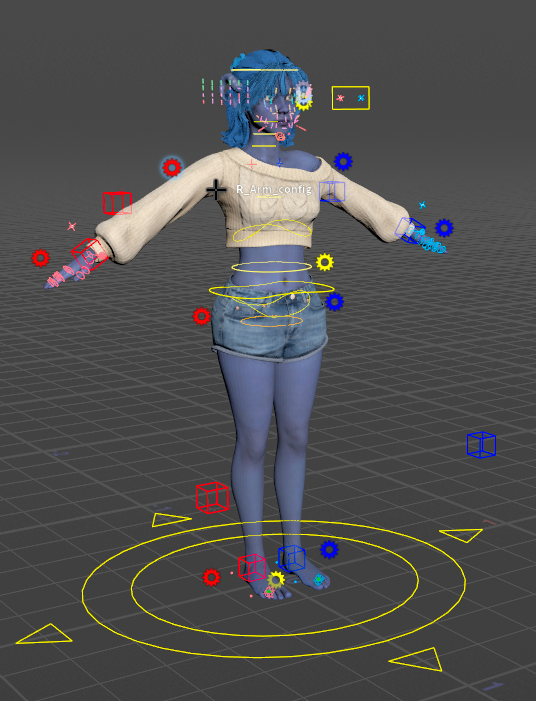
The face has its own sliders, and the rig node's Face Tools and Auto Animation folders add Face Puppet, Face Key Muscle, Auto Blink and Auto Breathe. See Animating.
Your character is built in Solaris (Houdini's /stage context), and Karma reads the rig node's output, so your animation is what renders. Click Go to LOPs (in the Rigger's Render folder) to jump there, then set up a viewport with a Karma render to see it.
Create Render Setup builds a three-point light rig, a camera, and Karma render settings for you. The bright red controller node in the LOP network holds every look control: skin, wrinkles, eyes, hair, and more. See The Lookdev Controller and Rendering.
That's the whole workflow. From here, read Building the Rig for the build options, then Animating.
What next?
- Adding more animation? See Clips & Layers.
- Animating the face? See Face Tools.
- Blinks and breathing? See Auto Animation.
- Scene files getting big? See Rig Settings.
- Something not working? See Troubleshooting & FAQ.